
Cattle Restraint
Having a basic knowledge of the animal’s behavior is important in safe and humane handling. Amount of restraint required varies with breed of cattle and frequency of handling. The more frequently animals are handled in a calm, non-stressful manner, the more easily they will become accustomed and accepting of handling and restraint methods.
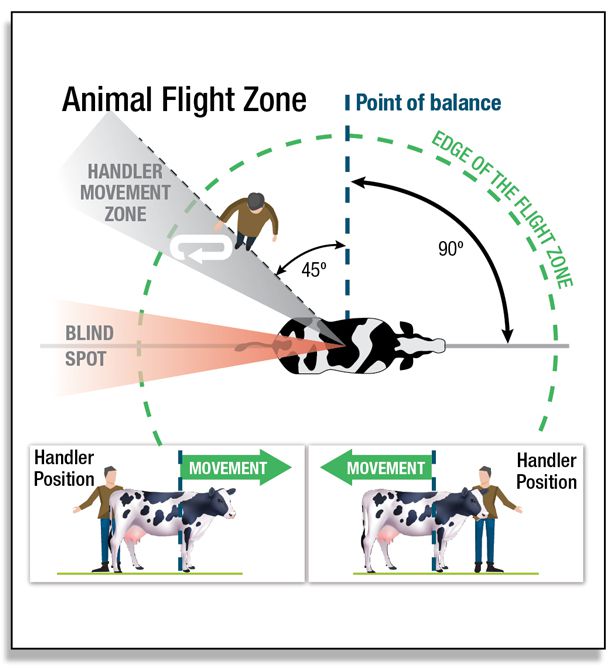
Knowledge and use of the flight zone of cattle is important. To determine flight zone, approach the cow and note at what distance it moves away. When handler is outside of the flight zone, the cow will turn and face the handler. Recognition of the flight zone of an individual or herd as well as understanding of how to work within the flight zone in a calm and patient manner is key to minimizing stress and reducing risk of injury to animals and handlers. Good communication between handlers is also important to maintain control.
- Cattle are herd oriented, motivated to maintain visual contact with each other, and will follow the leader. Separating an individual from the herd may be stressful.
- Cattle have a large field of vision (330°) and can see in almost any direction without turning their head; they do have a blind spot (approximately 30°) directly behind.
- Cattle may spook easily and are sensitive to intermittent loud noises, high frequency noises, and hissing sounds.
- They also are sensitive to harsh contrast in light and dark and may balk at variations in lighting (e.g., shadows, band of bright light); they will tend to move towards light.
- Cattle will look in the direction that they are about to go and will move toward the point of escape.
Handlers should be vigilant at all times so as to avoid injury to animals or themselves.
- Head butting and arc of swing
- Being caught between animal and solid structure (e.g., wall, fence, chute)
- Avoid being kicked or stepped on
- Front foot pawing
- Hind foot swings forward and then backward out to the side (“cow kick”)
- Basic types of restraint
- Halters
- Mechanical restraints (e.g., chutes, stocks, stanchions)
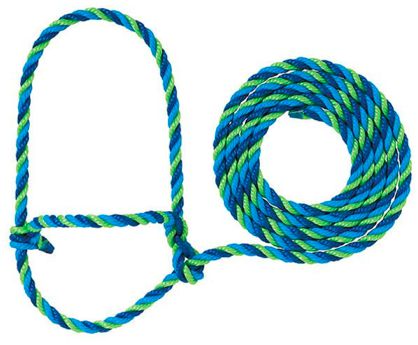
Rope Halters (Figure 1)
Hold slip lead and top of nose piece in left hand, and head stall in right hand.
Approach animal, typically from the left side, being respectful of the animal’s flight zone.
Slip nose piece over nose with slip lead under chin, and place head stall over the top of the head and behind ears.
OR
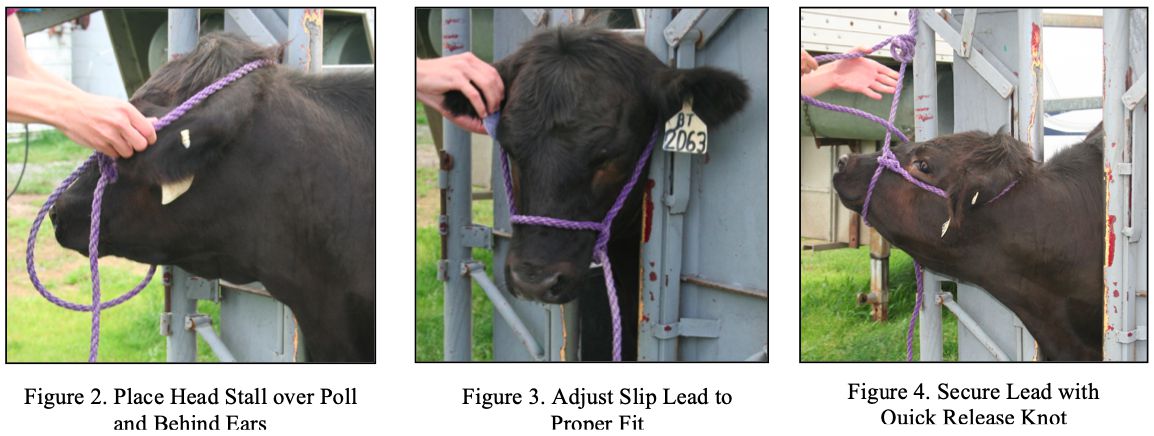
Place head stall over poll and behind ears, then place nose piece around nose, with slip lead under chin (Figure 2).
Pull the rope to adjust slip lead to proper size – for length of head and around nose (Figure 3).
Lead can be tied using a quick-release knot to a secure location, such as a ring or post, or to the stanchion if being used, with minimal slack (Figure 4).
Mechanical Restraint
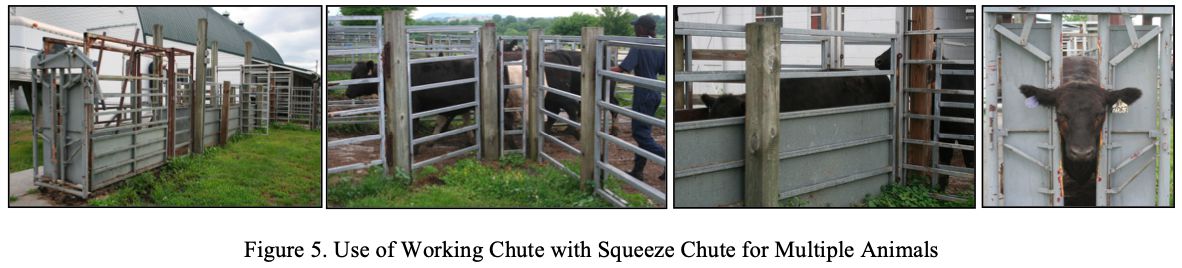
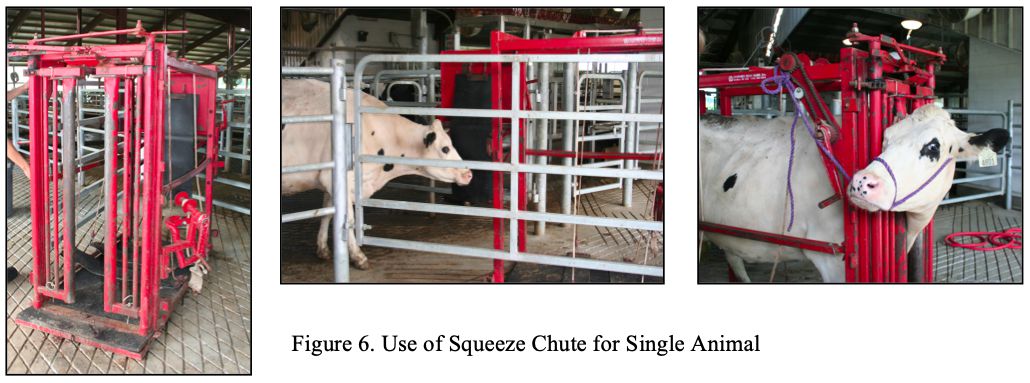
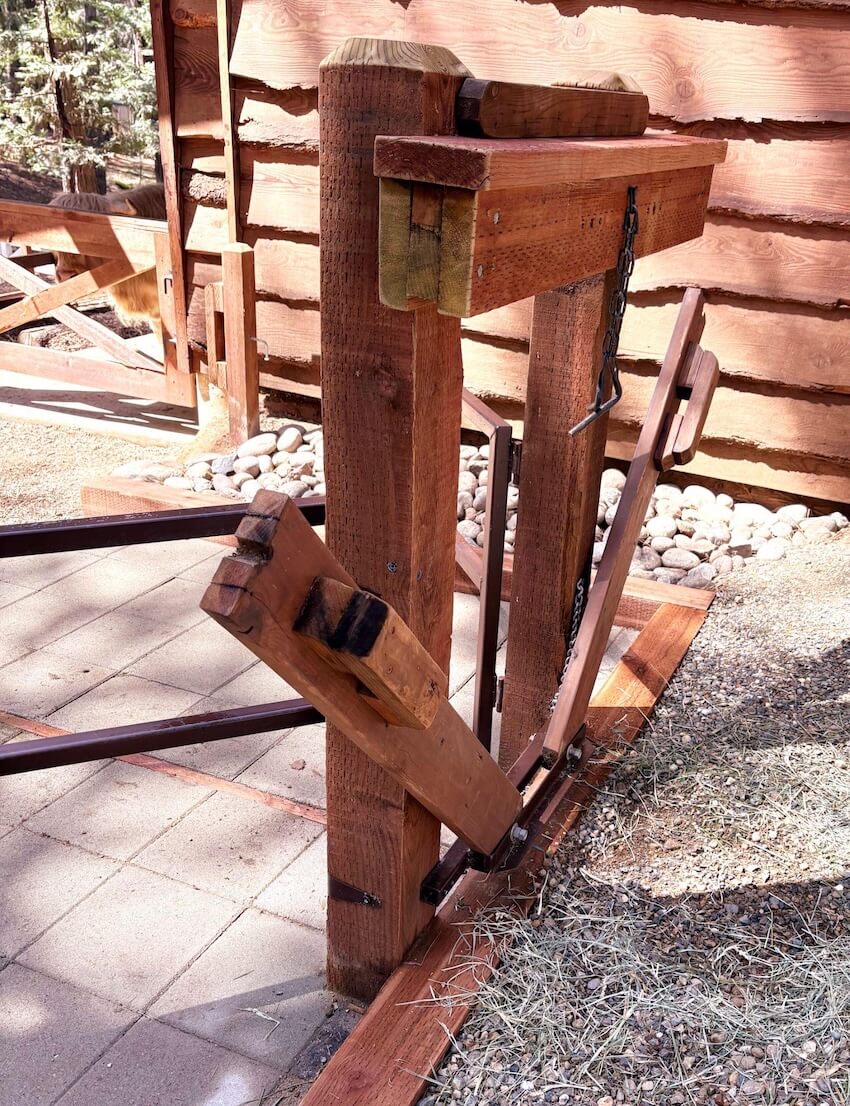
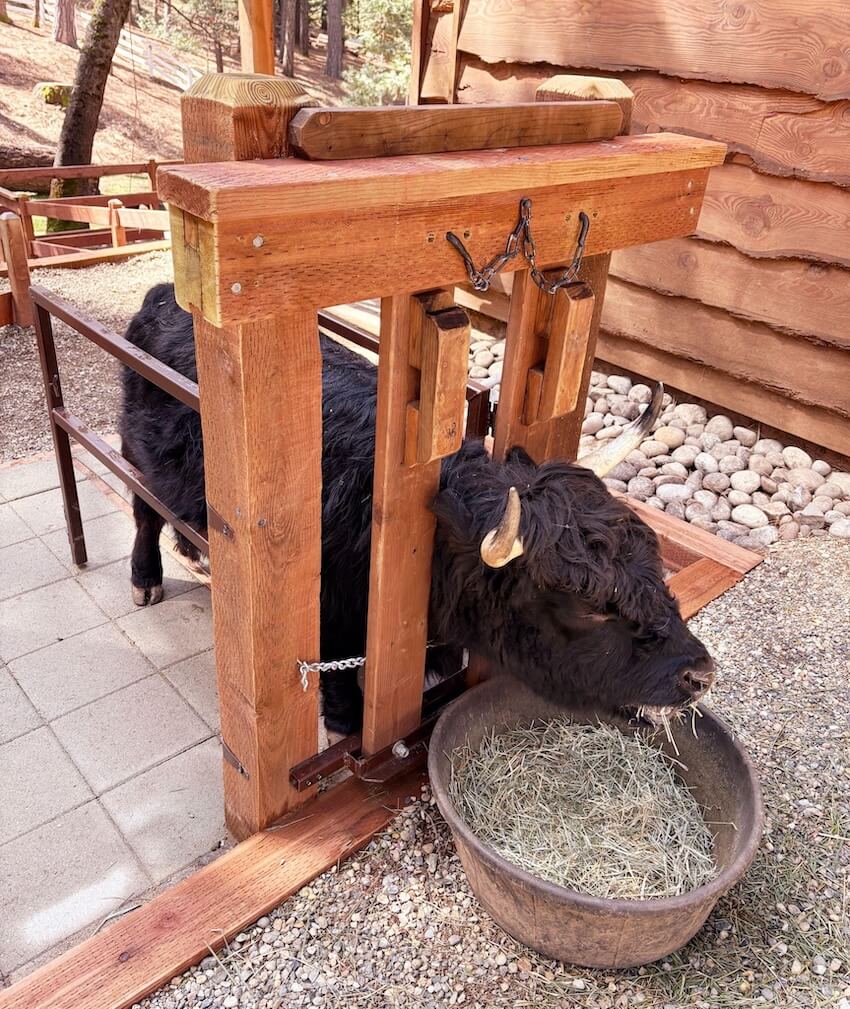
i. Cattle can be effectively and safely restrained in squeeze chutes, consisting of a headgate, tailgate, and sides that can be moved to change the width of the chute. The working chute leading up to the squeeze chute may include back-up or tailgate bars so that each animal can be enclosed as they pass through, so as to not move forward or backwards once secured (Figures 5 and 6).
ii. Handler should inspect all working parts and ensure that there are no obstacles or sharp objects that might injure animals prior to using chute or stanchions.
iii. As animal moves head through headgate, one handler closes head gate while a second handler places tailgate bar or rear gate depending upon style. Ensure that all latches, catches, or locks are secure. If squeeze chute, handler may be able to slowly squeeze animal to slow its progress to the headgate, to prevent injury from hitting headgate too fast.
iv. Once chute is secured, a rope halter can be used to restrain head as needed.
i. Applying even pressure with the squeeze allows the animal to remain upright and balanced; optimal pressure induces a calming effect.
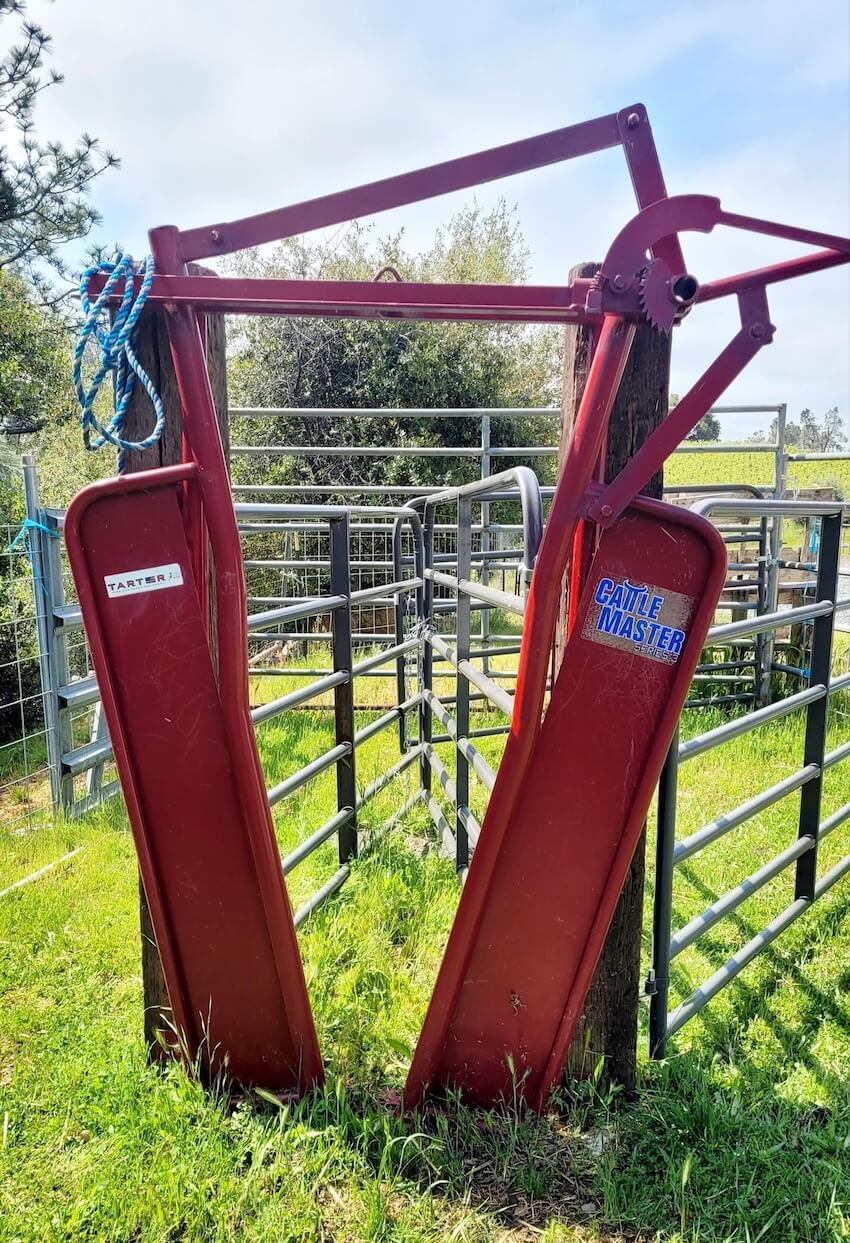
Standard Head Gate, to be attached to stable post or pillar

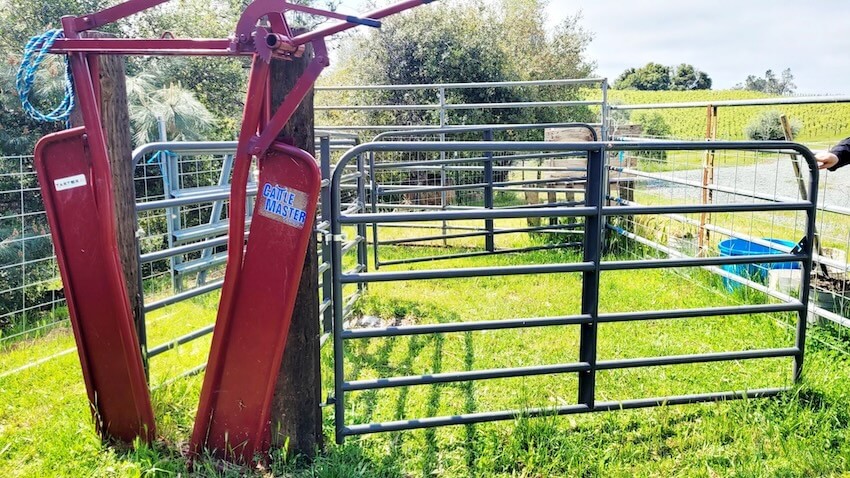
Fence panels attached to stable post, able to swing and guide animal into position
Original Source: SOP: Bovine Restraint - Virginia Tech
Cattle Injection
Administering Injections Properly
Steps in Administering Injections Properly
- Select the right product
- Read the label
- Don't combine vaccines
- Use transfer needles
- Don't mix too many products
- Keep shaking
- Mark and separate syringes
- Don't use disinfectants with modified live vaccines
- Get air out of syringes
- Restrain animals properly
- Select best route of administration
- Choose best site of administration
- Choose the right needle
- Use proper injection technique
- Practice good sanitation
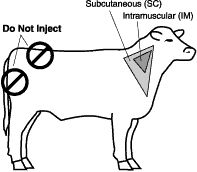
Use proper injection technique
When giving SubQ injections; tent the skin to get the product just under the skin and not into the muscle. Pull the skin away from the animal's body and insert the needle into the fold of skin. When giving multiple injections, keep injection sites several inches apart. Don't administer more than 10 cc of product into any one site. If a product must be given several times over a period of a few days, vary the injection site.
Original Source: https://www.youtube.com/watch?v=ZWECRSNI2eQ